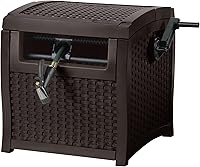
How to Assemble a Hozelock Hose Reel
To assemble a Hozelock hose reel, anchor the empty reel to a solid wall, attach the short feeder hose to the tap, then wind the full hose onto the drum through the guide. Tighten every fitting, turn the water on low and check for drips before you load the rest of the hose.
On this page (7 sections)
- What comes in a Hozelock hose reel first-setup box?
- How do you prepare the drum and hose before fixing the reel?
- How do you mount a Hozelock reel to the wall?
- How do you connect the feeder hose to the tap?
- How do you wind the hose onto the drum?
- How do you check for leaks before first use?
- Which supplies help a Hozelock setup go smoothly?
To assemble a Hozelock hose reel, anchor the empty unit to a solid wall, connect the short feeder hose to the tap, then wind the main hose onto the drum through the guide. Tighten every fitting, run water at low pressure and check for drips before you load the rest of the hose.
Most reels arrive as a drum, a frame, a feeder hose and a bag of fittings. Getting that order right is what makes the first setup quick, and it is the part people miss when they try to assemble and fill at the same time.
What comes in a Hozelock hose reel first-setup box?
A Hozelock reel usually ships in three main parts: the drum, the wall bracket or cart frame, and the short feeder hose. The smaller parts come separately in a bag, and they need sorting before you start.
Typical fittings include the tap connector, the hose-to-reel connector, a stop or spray connector, and the wall fixings. Some models add a blanking plug or a reducer.
Lay everything out and match it to the instruction sheet before you drill or build.
Check whether the reel is a wall-mounted unit or a freestanding cart, because the assembly order differs at the start. A wall unit needs its bracket fitted first.
A cart needs its axle, brackets and handle built before the drum goes on.
Keep the feeder hose apart from the main hose. They have different jobs, and confusing them is the most common reason a first assembly ends with a leak.
The feeder carries water into the drum. The main hose carries it out.
A generic ribbed anchor kit such as THE CIMPLE CO set also fits here. It contains 100 conical plastic wall anchors at #10-12 x 1 inch and 100 cable screw clips at #10 x 1-1/4 inch.
That is 200 pieces in total, with hex head screw clips in black.
The anchors suit wood, brick (masonry), concrete, stucco and drywall. The ribbed shape holds better than a smooth anchor in soft material.
The screws are precision machined from corrosion-protected metal so the fixing stays tight over time.
How do you prepare the drum and hose before fixing the reel?
Unroll the full hose on the ground and fit the reel-end connector first. Doing this while the reel is still off the wall gives you room to work and makes the joint easier to tighten.
Let the hose straighten in the sun for 10 to 15 minutes if it has been coiled tightly. A pliable hose winds better and is less likely to cross over itself.
Walk the length out so you can see the entire run.
Push the correct connector into the hose end and push the collar flat. It should click and sit flush with the fitting.
If it doesn't click, pull the hose out and check it is cut square rather than at an angle.
Check the reel inlet on the drum and any blanking cap. Some reels ship with the inlet closed, and that cap has to come off before the feeder hose goes on.
Sort the wall anchors and screws from the bag at this point. If the kit is short, a general kit of anchors and clips covers most brick, concrete, stucco and timber walls.
Check the screw size too. The kit's thread size is listed as #10-24 and #10-32, and the clip is a #10 screw.
If your bracket holes are smaller than the anchor body, the anchor will not pull flat against the wall.
How do you mount a Hozelock reel to the wall?
Fix the bracket to a solid wall using the holes suggested, then lift the empty drum onto it and lock it down. Two people make this easier, and the empty drum is far lighter than a full one.
Choose a spot that gives you a straight pull toward the garden and a clear path to the tap. Height matters: the reel should sit around waist to chest height so you can wind it without stretching up.
Mark the holes with the bracket held against the wall. For brick or concrete, drill to the plug size and tap the anchors in flush.
Fix the bracket firmly, check it for movement, and then hang the reel.
A ribbed conical anchor sits snug in a drilled hole. The ribs bite the sides of the hole, so the anchor grips before the screw draws it up tight.
That gives a more secure seat than a smooth plug, which can spin in a loose hole.
Don't mount the reel so high that the feeder hose has to loop back on itself. A short, tidy run from the tap keeps kinks to a minimum and makes the leak check quicker.
What size hole and fixing should you use?
Drill the hole to match the anchor body, not the screw. The kit's anchor is #10-12 x 1 inch long and its body is about 0.1 inch in diameter, so the drill bit has to suit that plug rather than a larger bolt.
Set the anchor so its head is flush with the wall surface. If it stands proud, the bracket will rock and the reel will wobble when you pull the hose.
How do you connect the feeder hose to the tap?
Push the tap connector onto the spout, screw the collar tight, then clip the feeder hose to it. The feeder hose runs from the tap into the reel inlet at the centre of the drum.
For a threaded outdoor tap, screw the connector on with the washer inside. For a plain spout, use the push-on version and push the collar up until it clicks.
Hozelock tap connectors cover both types.
Route the feeder so it doesn't loop low enough to kink. Keep it clear of doors and sharp edges.
A short run of 1 to 2 metres is normal for a wall-mounted reel near the tap.
This is the same joint that fails when a reel drips, so it pays to get it right now. Our guide to how to fix a leaking hose reel walks through the tape, washer and collar fixes if this connection starts to weep.
How do you wind the hose onto the drum?
Open the guide, push the hose end through it, then wind the drum by hand while keeping light tension. Feed the hose in evenly rather than letting it bunch on one side.
Thread the end through the guide and out of the outlet, then attach the stop or spray connector. Turn the drum, letting the hose lay in gentle side-by-side coils.
Guide it with one hand as you go.
Never pull it tight onto the drum. A slight slack keeps the coils relaxed and lets the hose come off smoothly.
Crushing it hard onto the drum is what causes flat spots and kinks.
If you don't have a hose included, our guide to how to attach a hose to a hose reel without leaks covers the connector end in detail. If your model has a guide, what a hose guide does on a hose reel explains why it prevents cross-winding.
How many clips and anchors come in the kit?
The CIMPLE CO set packs 100 anchors and 100 screw clips, so 200 pieces in total. The size name is 100 Pack, which refers to the anchor count, not the total pieces.
That is more than one reel needs, so spare clips are there for later jobs.
The clips are U-shaped and made to hold a cable in the groove, with a compatible groove diameter of 0.13 inch. On a hose reel they work as light cable tidy clips rather than as hose holders.
Keep that in mind when you plan fixings.
How do you check for leaks before first use?
Run the tap at low pressure, walk every joint and watch for drips at the tap, reel inlet and hose outlet. A slow trickle at one fitting usually means the collar is not pushed fully home.
Turn the water on gently rather than full blast. Pressure spikes are harder on new joints, and you want to hear a leak before the reel fills with water.
Run the hose out along the garden and watch the joints.
If the tap connector drips, check the washer is seated and the collar is screwed down. If the reel inlet drips, take the feeder hose off, check it is cut square and push it back in until it clicks.
Small drips at the outlet often trace back to the stop connector. Press the collar flat against the hose body and check the small rubber ring inside.
Which supplies help a Hozelock setup go smoothly?
Good anchors and correct fittings do more for a tidy setup than any extra tool. The reel does the work once the first assembly is right.
Buy the wall fixings if you are mounting on brick, concrete or stucco, or if the reel kit is short. A reel with a guide makes winding easier on a long hose.
If you are still deciding which model suits the garden, our guide to what is the best garden hose reel compares the main types.
The CIMPLE CO kit covers the fixing side well. Its 100 ribbed anchors are made from solid plastic with a ribbed design that holds better than a smooth plug.
The 100 black screw clips and their corrosion-protected screws give you spares for the bracket and for tidying the feeder hose along the wall.
The final check is simple. Turn the water on, wind the drum slowly, and watch the joints.
If everything stays dry, the reel is ready, and the steps above tell you how to assemble a Hozelock hose reel again if you ever take it down.
Frequently asked questions
Does a Hozelock reel need to be fully wound before it goes on the wall?
No. Most people mount the empty drum first because a full reel is heavy and hard to lift into line.
Wind the hose on once the unit is fixed and you can walk a straight run.
What hose length suits a Hozelock wall-mounted reel?
A wall-mounted reel usually takes a hose around 20 to 25 metres long. A freestanding cart often takes 30 metres.
Pick a hose length that reaches your farthest tap point once the reel is fixed, not one tall enough to store.
Can I use Hozelock fittings on another brand of reel?
Yes, the push-fit connectors work with Hozelock and most compatible brands. Mixing brands is fine as long as the connector seats fully and the collar clicks flat.
A loose collar causes drips at the tap or the reel inlet.
How do I stop the hose from kinking on the drum?
Wind the hose on through the guide and keep a steady tension with one hand. Leave the hose slightly loose rather than crushing it onto the drum.
A guide is the main protection against cross-winding.